Galaxy
Terrain types
Every hex is one of seven terrain types. Here's what each one means for your strategy.
Terrain shapes everything. Movement, sensor range, where you can settle, where it’s safe to fight — all of it depends on what’s on the hex.
Reading hex info
Move your cursor over any hex and a faint amber outline traces its border — a quick way to confirm which tile you’re looking at. Unexplored tiles stay labelled Unexplored, even while you are plotting a route into the unknown; hidden portions of the route appear only after your scouts chart them.
Move your cursor over an explored hex and the tile info card appears next to the cursor, showing you what your scouts know at a glance — no click needed:
- Terrain type — with an icon so you can tell deep space from a nebula without reading the label.
- Resources — current mineral, energy, or other deposit quantities while the tile is within sensor range.
- Anomaly — a remembered anomaly type after discovery, with current details only while the tile is visible.
Hover to explore. The card disappears automatically when your cursor leaves the map.
Where deposits are found
Raw mineral and energy deposits are scattered across the whole galaxy, but they cluster by terrain. Asteroid fields are the richest source of minerals; nebulae hold the most energy. Open deep space carries only the occasional minor deposit — enough that no corner of the map is completely barren, but never the motherlode. Turn on the resource heatmap from the map’s layer controls to spot rich pockets within your current sensor view. Its subtle tint runs from green for lean deposits to gold for the richest finds, while keeping the terrain beneath it visible.
A tile’s exact deposits are listed in its info card when you hover over it.
Deep space
Empty void. Cheap to traverse, no penalties or bonuses, and only the occasional minor deposit. The connective tissue of the galaxy: you’ll spend most of your fleet movement here.
Strategy: It’s the default. Star systems and rare anomalies are interesting; deep space is the gap between them.
Nebula
Coloured cloud of gas, often violet or cyan. Slows fleets significantly. Hides fleets inside it from external sensors — perfect for ambushes.
A Scout Corvette inside a nebula is invisible to anyone watching from outside. So is your fully-loaded battle fleet.
Faction note: Vanguard Nomads ignore the movement penalty. They live in nebulae the way other factions live in deep space.
Strategy: Use nebulae as staging grounds for surprise attacks. Place a fleet inside, let an enemy approach, attack from concealment. Mine exotic matter from the rare deep-nebula nodes.
Asteroid field
Loose belts of crisp rocks and fine debris drift over the dark void, leaving open space visible between clusters. Asteroid fields slow movement. Adjacent star systems get a mineral production bonus when colonised — the field is a harvestable resource, not just an obstacle.
Strategy: A star system bordering an asteroid field is a premium settlement target. Found a colony there early; it’ll out-produce a generic colony for the entire game.
Ion storm
Crackling energy field. Slows fleets and damages them while they’re inside. Damage is light per turn but compounds — a fleet that lingers will be crippled.
Strategy: Avoid long stays. No current technology removes the hazard, so cross only when the shorter route is worth the risk.
Star system
A habitable hex with a star, planets, and resources. Where civilisations actually live. You found a colony by moving a fleet here and choosing Settle.
Stars come in five flavours, each with its own visual signature on the map:



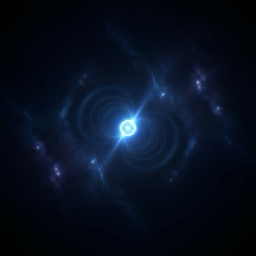

Star systems vary in quality:
- Habitability affects population growth speed.
- Resource bonuses vary — some systems have +energy, some +minerals, some +bio.
- Anomalies sometimes contain ancient ruins, derelicts, or first-contact opportunities.
Hover over the hex to see all of this in the info card before you commit to settling.
Strategy: A high-habitability system with two adjacent asteroid fields is a four-empire system. Don’t waste it on a small colony; build it tall, specialise it, defend it heavily.
Black hole
Impassable. Fleets that enter a black hole are destroyed. The hex blocks line-of-sight: you cannot see past it.
On the map a black hole reads as a deep, pure-dark core wrapped in a thin warm ring of light — unmistakable, and a clear “do not enter” at a glance.
Strategy: Use them as natural barriers. A star system protected by a black hole on one flank only needs defence on the other. Plan your border accordingly.
Wormhole
Linked pair. Entering one wormhole takes you instantly to its partner, anywhere on the map, for no movement cost.
Wormholes are rare — typically two pairs per galaxy. Finding one rewires your understanding of the map. Controlling one rewires your enemies’.
A wormhole shows as a calm ring of cyan and violet light around a clear dark centre — the visual cue that this tile is a stable gateway, not just empty space.
Strategy: Scout for wormholes in the first 20 turns. If you find one, plan around it — both ends. An unguarded wormhole is a backdoor into your empire.
Quick-reference table
| Terrain | Move cost | Damage | Settleable | Sensor effect |
|---|---|---|---|---|
| Deep space | 1× | none | no | normal |
| Nebula | ~2× (1× for Vanguard) | none | no | hides fleets inside |
| Asteroid field | ~2× | none | adjacent only (bonus) | normal |
| Ion storm | ~2× | yes | no | normal |
| Star system | 1× | none | yes | extends sensors |
| Black hole | impassable | n/a | no | blocks line-of-sight |
| Wormhole | 0 (jump) | none | no | normal |